Using Code Generation
Let’s see the power of code generation. This guide shows how to use the code generation features via the Studio Web UI.
Check Project Configuration
Projects created from the template usually need no extra configuration. To be safe, we’ll review key settings and what they mean.
Launch Studio Web UI with perigon studio, then click the ⚙️ next to a solution to open the configuration dialog:
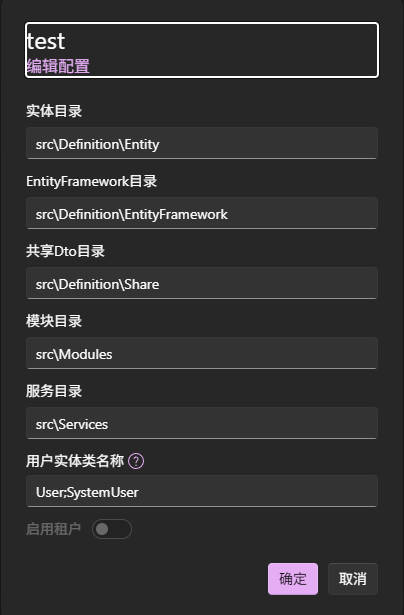
The settings mainly cover directory layout. You don’t have to stick to the default structure—custom folders are fine as long as they match the configuration.
Pay particular attention to the User Foreign Key Name. The template includes UserId by default, representing the foreign key from other entities to the user entity.
Note
The User Foreign Key Name refers to authentication-related entity links (often used for data permissions). The value comes from IUserContext and influences generator logic, so it’s important to distinguish it from ordinary entity relationships.
Generate DTOs, Managers, and Controllers
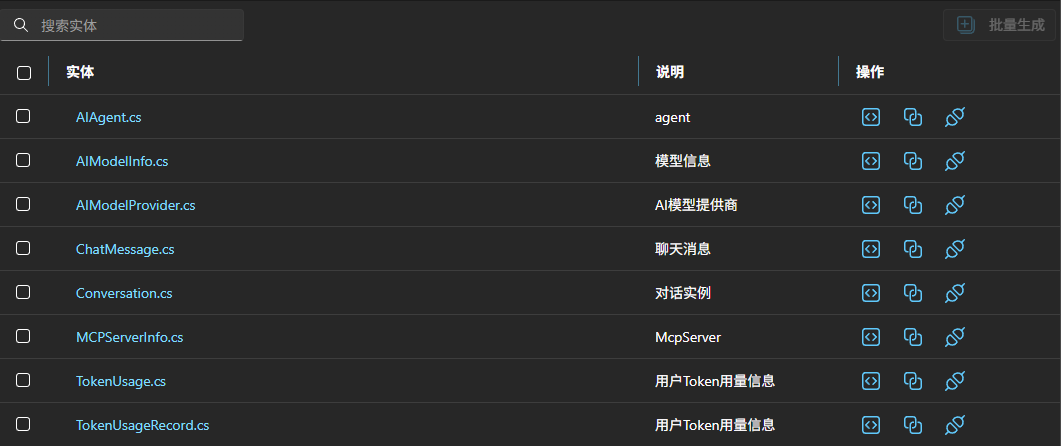
Select a solution to open the workspace. You’ll see an entity list with three generation actions:
- Generate DTOs: parse entities to produce DTO model definitions.
- Generate Managers: create manager classes with basic CRUD operations. DTOs generate automatically if missing.
- Generate Controllers: create controllers with CRUD endpoints. Managers and DTOs generate automatically as needed.
Generate Client Request Services
Use the OpenAPI spec to generate client request code.
First, add an OpenAPI endpoint. In the left navigation, choose OpenAPI, then click ➕ to add a spec:
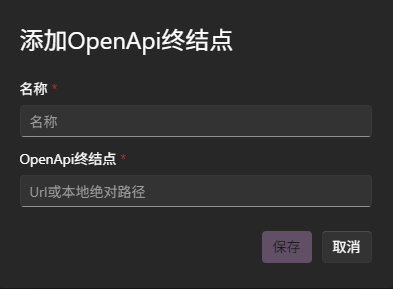
After adding, the tool fetches and parses the JSON (ensure the URL is valid and reachable), then lists endpoints and details.
Now generate client request services by clicking the </> button on the right of the top action bar:
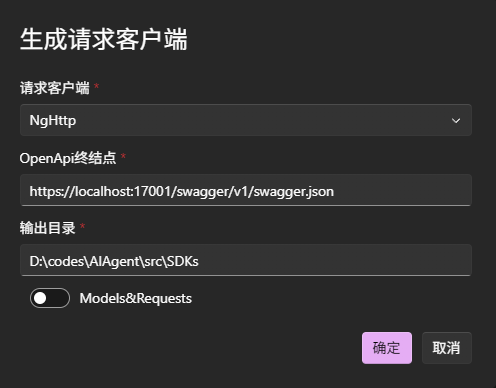
- Client type: Angular, C#, or Axios.
- Output directory: where generated code is placed.
- OnlyModels: unchecked by default. When checked, generate models only (skip service code).
Note
If the generated client doesn’t meet your needs, customize templates to suit your style. See Custom Generation Tasks.